Imagine this: You've crafted the perfect email campaign, send it out expecting to get amazing results, but it ends up in the spam folder, unseen and unopened (or worse, not delivered at all). Why? Because the rules of the game have changed.
Google and Yahoo are pushing some major updates beginning in February of 2024. They are turning what was once considered best practices for email authentication into mandatory requirements—and senders who don’t comply with the new requirements will start to see issues getting their emails delivered in 2024.
These aren't just minor tweaks; they're significant overhauls to email sender policies that could make or break your email marketing efforts.
If you want to make sure your emails keep making it to the inbox, follow these 5 steps.
We'll address these updates in 2 phases. One will be the technical setup, and then we'll cover the best practices you'll need to adhere to in the future. (Spoiler alert, this is NOT the email apocalypse... if you do it right.)
PHASE 1: The Technical Setup
First let's talk about the technical setup. We'll cover what needs to be done and then point you in the direction of GETTING it done. We'll also be providing step-by-step training for our DigitalMentors DM Hub users via videos below
1. Use a Professional Email Address
The most important aspect, and something we've been preaching for a very long time, you can no longer send mass emails from a Gmail or Yahoo or 'free' email account. You MUST be sending from a professional email. Meaning you need to use an email address that leverages your domain. For example, not AcmeBusiness@gmail.com, but rather joe@acmebusiness.com.
2. Authenticate Your Emails & Mailing Domain
This piggybacks off of having your own professional email address. We need to make sure we authenticate our emails and mailing domains. This gets a little technical and we won't go in to great depth, but this revolves around connecting your domain to whatever email or autoresponder service your use for your email marketing, and creating some settings on your domain (called DNS records) - specifically records called DKIM and SPF.
- For DKIM, you’ll usually be given a specific DNS record to add from your provider. This is often a TXT record that includes a public key provided by your email service.
- For SPF, you’ll need to create or update an SPF record in your DNS settings. This record lists the mail servers authorized to send emails on behalf of your domain. Again, you can get this from your service provider.
IMPORTANT NOTE FOR DM HUB USERS: If you've gone through our technical onboarding process, this was done for you. If you elected to do it yourself, we provided you with the specific records, settings and instructions to complete this task.
3. Set Up a DMARC Policy
Moving on to DMARC (Domain-based Message Authentication, Reporting, and Conformance), this is another crucial element in your email authentication strategy, especially with the new Google and Yahoo updates. DMARC helps in further securing your email communications by tying together SPF and DKIM, adding an additional layer of verification.
The process here is similar to setting up SPF and DKIM as it requires a DNS record. Watch the video below for a full walkthrough on how DM Hub users can get this setup, though the process remains the same regardless of what service you are using.
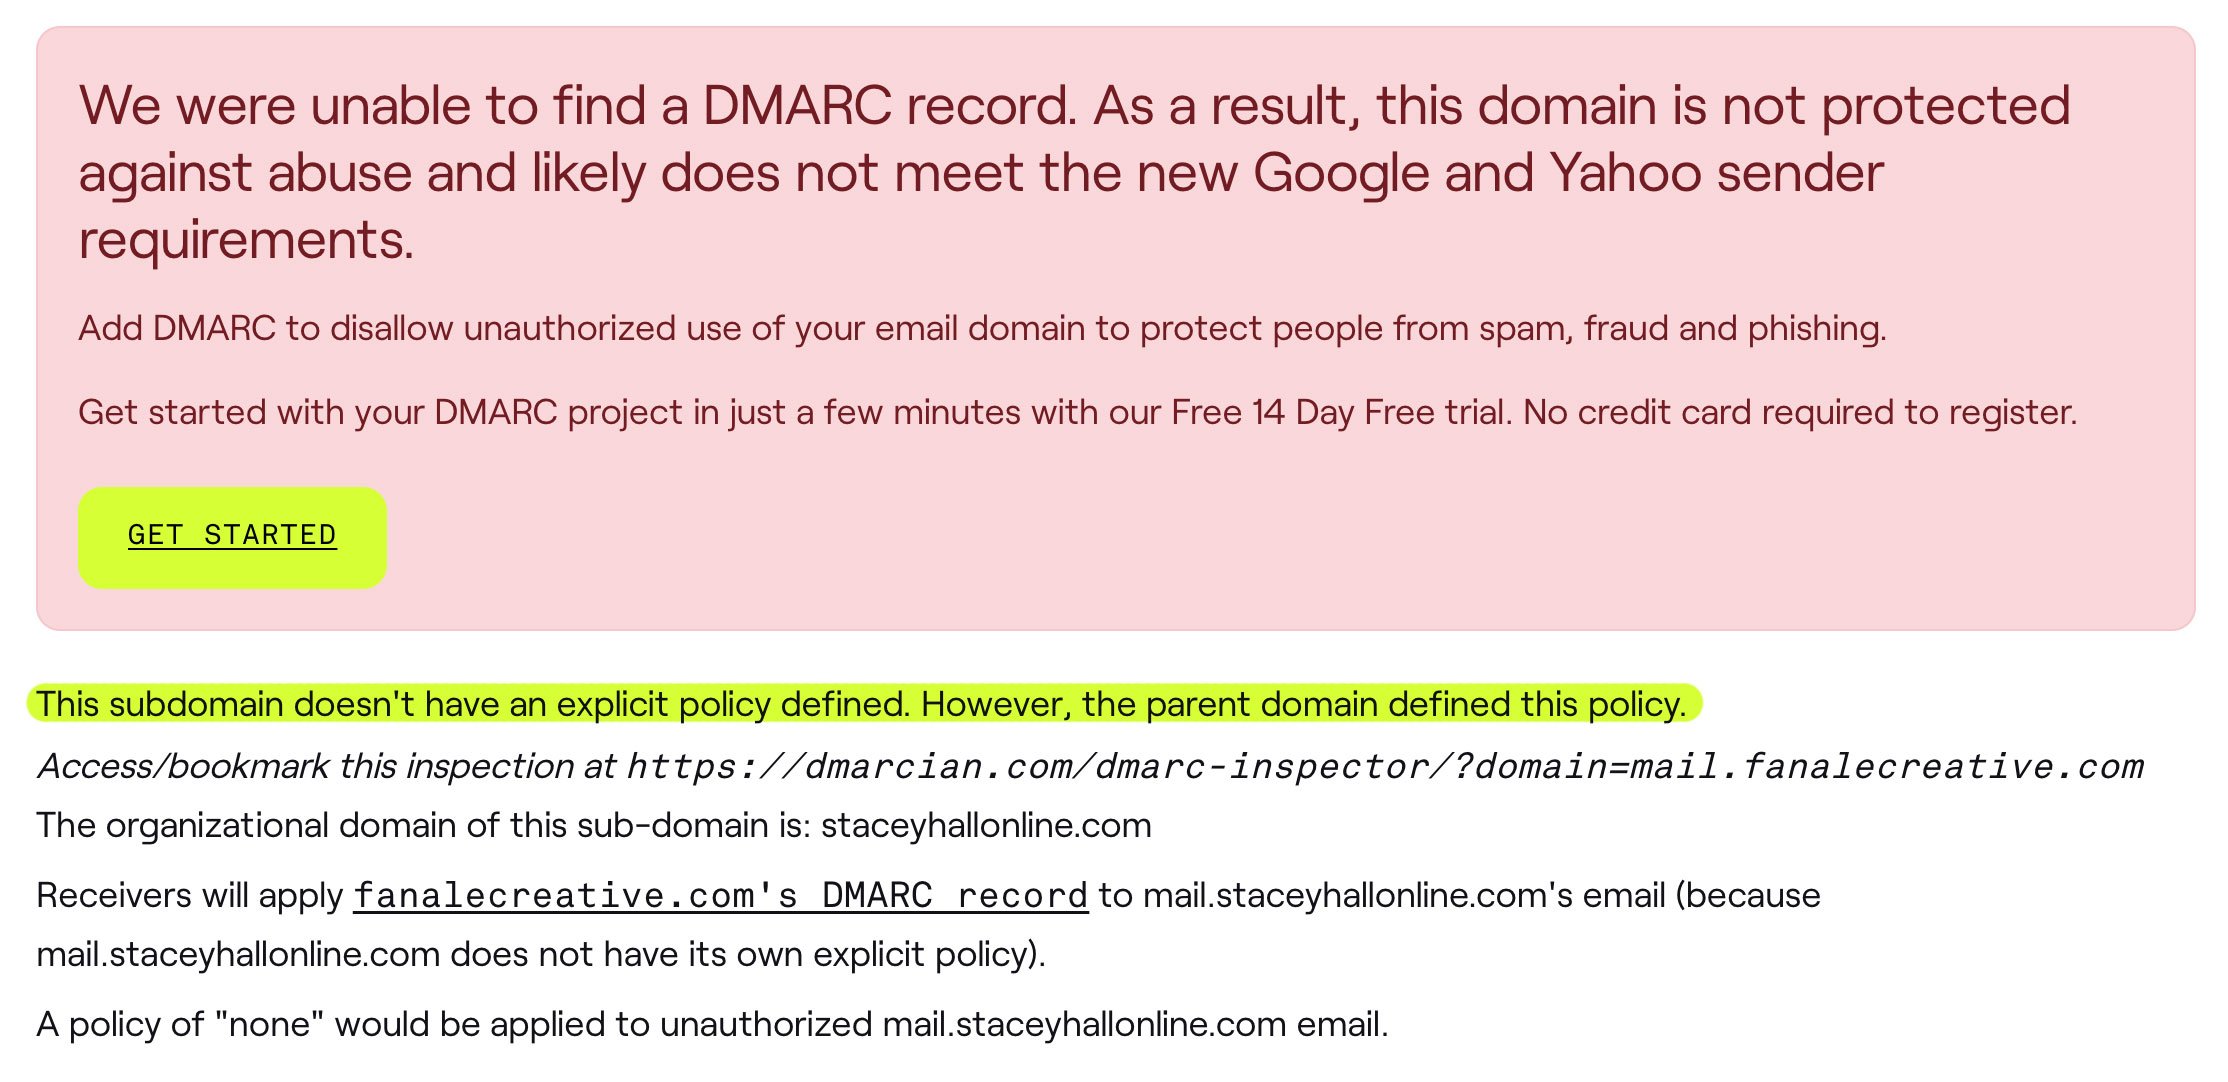
NOTE: If you have a DMARC record on your main root domain, you do not necessarily need to put one on your sending subdomain (if used). If you are testing with DMARCIAN, and you see the red error box, pay close attention to the text under the red box. You may be protected by your root domains DMARC policy. However it is considered best practice giving you more security and control with your DMARC policies.

HOW TO FIX: The first thing we recommend you do is test your sending domain to see if you already have a DMARC record.
Testing for Your DMARC Record can be done here: https://dmarcian.com/dmarc-inspector/
We recommend testing your root domain as well, you will want a DMARC record on your root domain as well.
If you 'fail' the test, that simply means we need to add a DMARC record to your domain. Follow the steps in the video above to accomplish that. The key is to make sure you are using the correct domain setting for your DMARC record, as well as the correct value, which we have listed below:
TYPE: TXT
NAME: _dmarc.[your sending subdomain]
CONTENT/VALUE: v=DMARC1; p=none;
If you need to create a DMARC record for your ROOT domain as well, it's the same exact process with the exception of the 'name' value being just _dmarc, like so:
TYPE: TXT
NAME: _dmarc
CONTENT/VALUE: v=DMARC1; p=none;
Phase 2: Adhering to Best Email Practices
Along with the technical aspects of these required updates, there are also some best practices you will want/need to adhere to and be consistent about moving forward.
Check out the video below for a quick walkthrough on those, as well as some services you can leverage to track your progress and test out your setups!
1. Always Send From Your Professional Email
You will forever now be mailing from your professional email. You never want to use (or pretend to be using) a 'Gmail' or 'Yahoo' or freebie email when using your sending domain. Make sure you are consistent with this as sending from the incorrect email that doesn't match your sending domain could have an effect on your domain reputation, and ultimately your deliverability.
2. Easy One-Click Unsubscribe Options
It's always been best practice to allow your contacts to easily unsubscribe from your emails. Most mailing services (DM Hub included) already insert the necessary unsubscribe headers for all of your email messages. This enables links located next to the sender name of an email allowing email recipients to easily unsubscribe without having to dig through an email or resorting to hitting the "Mark as Spam" button.
EXAMPLE:

It's still best practice to include an unsubscribe link in your email body copy, and typically this is done at the bottom of the email. Again, for most service providers, this is one either automatically or by simply turning on a setting (Within the DM Hub, there is a setting that is on by default that adds an unsubscribe link to the footer area of all mass emails sent.)
3. Keep Spam Complaints to 0.3%
While keeping spam complaints low has always been critical to email deliverability, it's now been given a number with this new Google and Yahoo update. You need to keep your spam complaints to .3% - numerically, that means every time you send an email out to say 1,000 contacts, you want a maximum of 3 people to mark it as spam (Ideally nobody marks it as spam if you are doing your email marketing correctly.)
HOW TO FIX: The best way to achieve this goal is to make sure you're sending to subscribers who actually asked for your email, and to make sure your messaging is what they're expecting to receive from you. You can usually track your spam rate from within your service provider (this goes for the DM Hub) however Google does not share this information with your service provider, so we highly recommend signing up for Google Postmaster which will provide you critical and ongoing information about your email sending practices. More on this below.
How to Test and Maintain Your Email Sending Compliance Moving Forward
As stated above, hopefully you've been following these best practices from day 1, and at most you may have to add some of those technical setting we discussed to help authenticate your email domain.
With that said, there are some services that can help you test your setup, and give you ongoing insights in to your spam complaints, your sending domain reputation and your deliverability.
Tracking Spam Complaints
You can see your spam complaints usually within your service provider. DM Hub will provide this information on a per-email basis, as well as a whole so you can track how well you are adhering to the guidelines. However, Google and Gmail are a special case as Google does not provide that information to your email sender. That's why we recommend signing up for Google Postmaster Tools. This will allow you to add your domain to their postmaster tools where they will provide you with spam complaints, domain reputation and more.

Testing Your Technical Setup
Because of the importance of the technical setup side of things, with the SPF, DKIM, and DMARC records, we also recommend you testing that out after you add the records. There is service that can help you with that. They provide you with an email address that you can send an email to (be sure to send it from your email service like the DM Hub) and they will email you back a report making sure you have everything setup. The walkthrough on this is explained in the above video. You can click here to run through it.
IMPORTANT NOTE: If you are planning on testing your email with Arsen as shown above, please allow some time to pass until you test if you just now added a DMARC value to allow time for everything to propagate. Recognizing DMARC records takes time. It usually requires a few hours to spread across DNS servers. Your DNS can take up to 72 hours to update your DMARC record, but in most cases, it gets updated within far less than 24 hours.
That's a wrap on the scoop about Google and Yahoo's email updates! The bottom line? SPF, DKIM, and DMARC are your new best friends in making sure your emails hit the mark. It's more than just ticking boxes for compliance; it's about keeping your email game strong and trustworthy.
Don't wait around - get those updates rolling. It might sound like techy mumbo-jumbo, but it's super important for keeping your emails out of the dreaded spam folder. Need a hand? Your email provider can help sort it out. And for you DigitalMentors members, we're just a chat away.
Tags:
Email Marketing
January 17, 2024


Comments